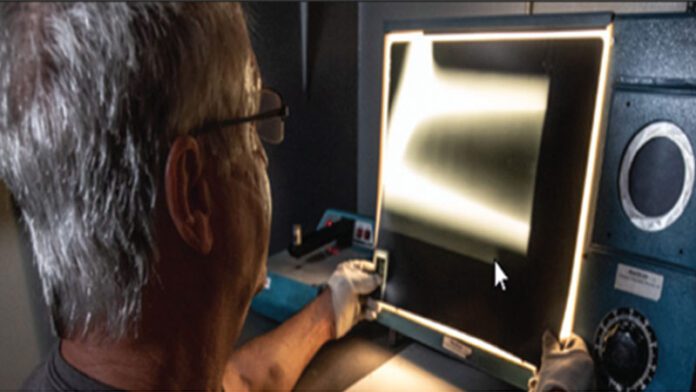
Demanding industries such as aerospace and defence require highly specified castings. This article by casting expert Michael Porfilio takes a detailed look at the general process in which a highly-specified casting is produced in a high-alloy foundry.
By Michael Porfilio, Director of Quality and Technical Services, SF&E
When foundries are contracted to make high-specification castings in the nuclear, naval, petrochemical, defence and other demanding industries, there are unique sets of rules and guidelines that must be followed to ensure all identifying criteria are met during production. These products are set at such high standards as they typically are used in critical situations. The progression in which a casting can be certified as a highly specified product varies from foundry to foundry.
Common threads
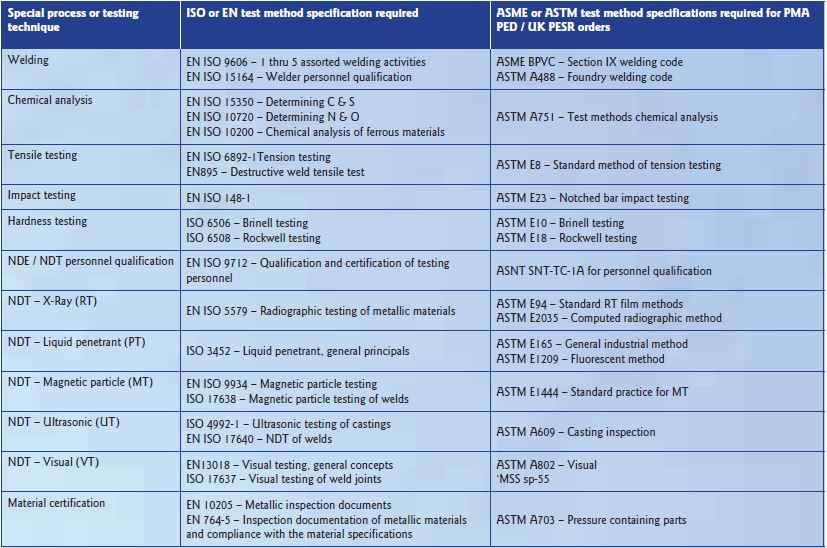
Table 1 deciphers some of the EU/UK vs. US material and testing specifications. The world market is open to designers of high specification and high alloy castings. To begin the process, it is helpful to understand the similarity and interchangeability of the processes of inspection and testing. Table 1 highlights some of these similarities.
Visual Testing (VT): surface analysis
Visual inspection and testing are always the first steps in the evaluation of a casting. The appearance of the general condition is the first thing to look at. Does the casting have visual defects and if so, what size are they? Do they meet the general criteria needed that are called out on the castings VT acceptance criteria? Visual testing is often performed using only one’s eyes. Magnifiers, bore scopes, and mirrors all can assist. Where high-specification work is being inspected, the report form and the endorsements contained in it are key. One of the most common standards to perform visual testing on sand castings is SCRATA comparator plates.
This is a series of photographic plates with some acceptable and some unacceptable images. It is a simple inspection practice employing ASTM A802. This standard has four quality levels to work within. Each of these levels works with a set of tactile plates with different defect classifications and the severity of those defects. Investment castings have tighter requirements to comply with, such as ASTM A997 with many quality levels.
Magnetic Particle Testing (MT): surface technique and slightly sub-surface technique
Magnetic particle testing is very commonly applied to high-specification projects. It is an extremely sensitive method of NDT which can be done both wet and dry. MPT can only be performed on ferromagnetic materials. It shows the location of linear defects very well. Rounded defects do not show up as easily due to how the magnetic field travels past the indications. A side benefit of MT is that if there are slightly sub-surface defects, they will show up during the examination.
Liquid Penetrant Testing (PT): surface technique
The flexibility of liquid penetrant testing makes it a versatile technique which can be applied in the lab or in the field easily. It is a simple NDT method but very powerful. It can be performed as a water-washable format or an extremely sensitive solvent method.

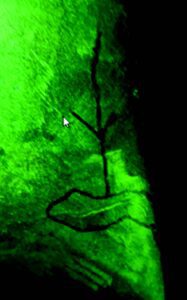
There is a fluorescent technique that is also very sensitive that is inspected in the dark with a black light. Liquid penetrant is generally used for testing on non-magnetic materials.
A word of caution when processing high alloy castings with PT: with nickel-based alloys specifically, grain boundary effects and false indications can be present. When in the presence of inexperienced source inspection personnel, these issues might be determined to be rejectable.
Also, broad areas of pigmentation where there is a haze of penetrant that may not have been completely washed off require that the process be cleaned and repeated.
Radiographic Testing (RT): volumetric technique
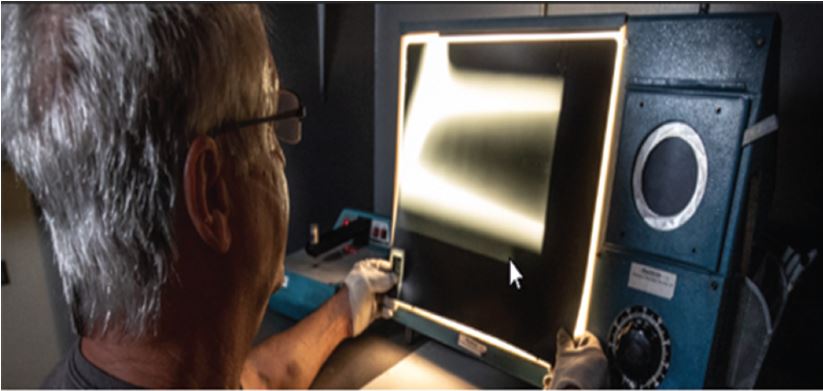
Radiographic testing is a well-accepted method. It directs source radiation through the casting of interest and images are exposed on the film. The film has many quality indicators (IQI’s) to ensure that the x-ray films meet all the appropriate specifications. Radiography has numerous different standards made of reference radiographs with many different defects and conditions highlighted for acceptance.
Most of these standards have levels of acceptance that are used to depict porosity such as shrinkage categories, tears and cracks, and other anomalies. Reference radiographs which are put out by many agencies such as ASTM and EN/ISO offer at times subjectivity due to many of the defects that are exposed.
Ultrasonic Evaluation (UT): volumetric technique
Being a volumetric method, UT offers a strong and accurate technique to see defects and items of interest within the casting. There are many engineering firms and OEMs that specify UT over RT as they feel it is more accurate and reliable. UT is also capable of measuring material thickness. UT offers the flexibility of being a portable method. It can be done on-site and brought to the field where parts may be located. Radiography is more cumbersome and inconvenient for portable field work.
NDE / NDT overview
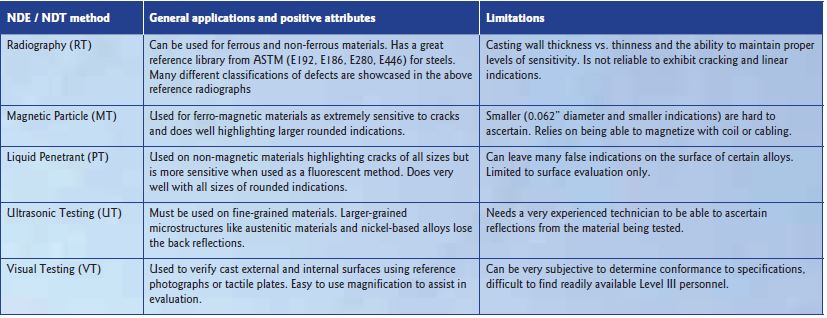
Table 2 lists common NDE / NDT activities with some positive attributes and limitations that come with each technique.
Dimensional Testing
Customer orders often require the produced parts to be measured to verify conformance to the customer’s drawings. They are expected to be able to measure with electronic devices such as coordinate measuring machines (CMM’s), dimensional scanners, and other electronic hand tools.
Positive Material Identification (PMI)
Monitoring incoming materials as melt stock, qualifying outgoing foundry returns sales, as well as fulfilling contract or specification requirements makes PMI an extremely useful and operator-dependent procedure. PMI is a portable chemical analysis using a hand-held analyzer. This type of analyzer uses an x-ray tube which is like the full-sized XRF chemical analyzer or a laser-induced ablation technique (LIBS).
Hardness testing
Hardness testing is a way to measure the surface quality of a cast material via proper response to heat treatment. It can be an indicator of the performance of the material based on its given application and is typically a requirement when certifying any high-specification cast alloy. Rockwell, Brinell, Vickers, Knoop, and Leeb-Equotip methods are commonly used in the foundry industry to meet high specification requirements. There is a multitude of specifications for the testing of material hardness both ASTM and EN/ISO.
Metallurgical testing
In high-specification work, the need to determine the chemical, mechanical, and material properties of cast metal is crucial in ensuring that the customer receives a product that meets their design requirements. OES, tensile, hardness, impact, corrosion, metallography, and ferrite prediction testing are all essential methods to satisfy the stringency of high-specification castings.
Source inspection
A source inspector is hired by a customer / disinterested third party, or the engineering group overseeing the project, to witness milestones in the creation of the casting. Common oversight is for some of the following operations:
- Contract review
- Melt and pouring
- Stamping of heat numbers for traceability – castings and test material
- Heat treatment
- Welding
- Post-weld heat treatment
- All the inspection operations – VT, RT, MT, PT, dimensional, etc.
- Endorsement of the certification package
- Shipping operations
In conclusion
The contract review, inspection, and material testing of high-specification casting are crucial to ensure that all identifying criteria are met during production. Projects require many details to be followed for a high-specification casting to be produced right the first time. The potential for economic and environmental impacts or loss of life puts stress on the foundry to verify the steps and operations are correct, processed by properly qualified technicians and certification personnel, and produced to the highest of quality and standards.
About the author
 Michael Porfilio has worked in the American foundry industry since 1980. His background is in the fields of metallurgy, quality management, sales, and marketing as well as operations management. He is a NDE Level III / ASME NQA-1 Lead Nuclear Auditor and ASTM A01, E01, and E07 Committee Member. Mike is the Director of Quality and Technical Services at Stainless Foundry & Engineering, Inc. in Wisconsin, USA, and also performs consulting in the business, quality and materials arenas.


